Handmade Christmas decorations are certainly not too strange to those who love DIY (do-it-yourself).
And if you’re looking to add a special touch to your holiday celebrations, here are the 4 creative ideas for beautiful, easy-to-make handmade Christmas decorations that will impress your guests!
1. Top 4 Simple and Easy-to-make A Handmade Christmas Tree Decorations
As the Christmas seasons approaches, decorating a Christmas tree is not only a fun activity but also an opportunity to express your creativity.
If you are looking for beautiful and easy-to-make decorations ideas, let’s check out the top 4 methods below. With easy-to-find materials and easy instructions, you will quickly create impressive decorations, bringing a warm and joyful Christmas atmosphere to your home.
1. Handmade Christmas Decorations for Christmas Trees with “Merry Christmas” Letters
There are many unique ideas on how to decorate a handmade Christmas tree, one of them is to create DIY “Merry Christmas” letters to hang on the tree. You can make it by clay and salt dough.
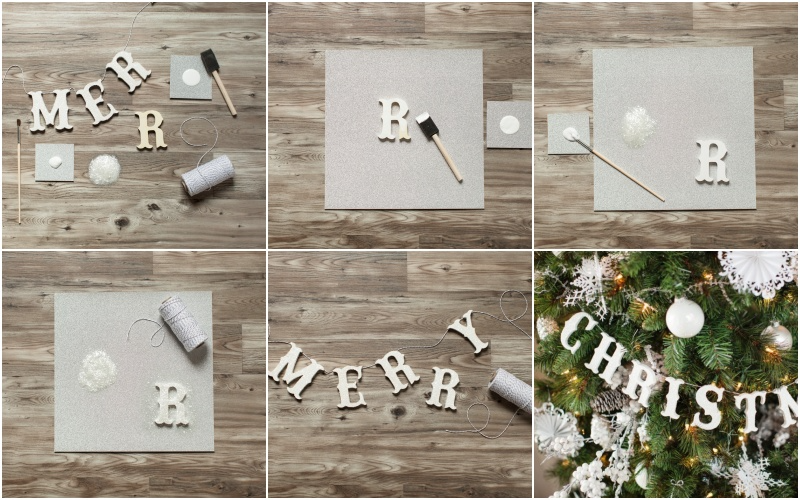
Materials:
- Clay or salt dough letters spelling “Merry Christmas” (approx. 10 cm each)
- White acrylic paint
- Clear crystal glitter powder
- Craft glue
- Small paintbrush
- Hot glue gun and glue sticks
How to Make: Christmas Trees with Homemade Merry Christmas Letters
- Shape letters out of clay or salt dough, then bake them for durability.
- After the letters are dry, paint or glaze each letter in festive colors, then use a small paint brush to apply glitter glue to the painted letters.
- For extra sparkle, add another layer of glue and sprinkle more glitter where needed.
- Use the hot glue gun to attach each letter to a length of twine. Hang it horizontally across your tree or drape it in a garland style.

2. Handmade Christmas Decorations for Colorful Staircase with Paper Leaves and Berries
Decorating your staircase can really brighten up your home for the holidays, creating a warm and festive vibe. Making a DIY garland with paper leaves and berries is a fun project that the whole family can enjoy together!
Materials:
- Light and dark green craft paper
- Red and orange paper or felt for berries
- Scissors
- Butcher paper
- Roll or chenille
- Glue gun
- Fly leaf template
How to Make: Handmade Decorative Leaves
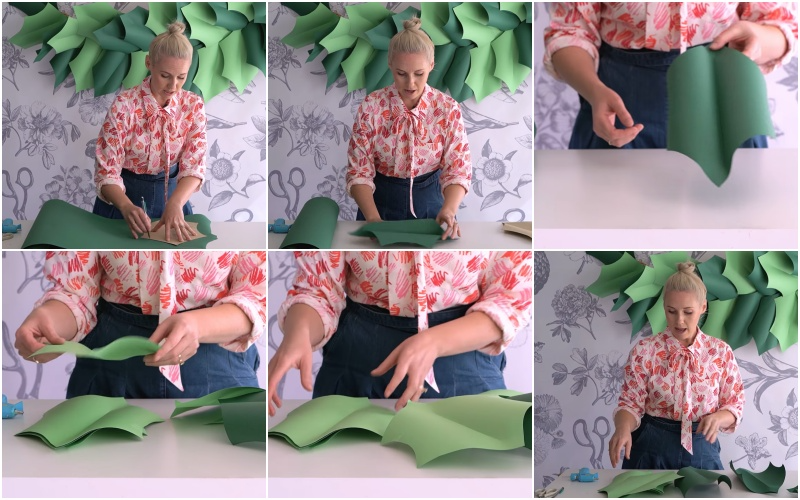
- You use the fly leaf template and draw leaf shapes on light green and dark green paper, then cut them out. The number of leaves depends on your preference and the area of the space you are decorating.
- After cutting enough leaves, fold the leaves lengthwise so that it has a crease in the middle. This will help create a beautiful 3D effect for your space when decorating. Fold each leaf lengthwise to add a crease in the middle for a realistic 3D effect.
- Use butcher paper and twist it to form a tree trunk. Note, remember to measure the length or space you want to decorate before cutting the paper. Twist butcher paper into a long, rope-like shape to serve as the base for your garland. Measure the length of your staircase or area where the garland will hang.
How to Make: Handmade Berries
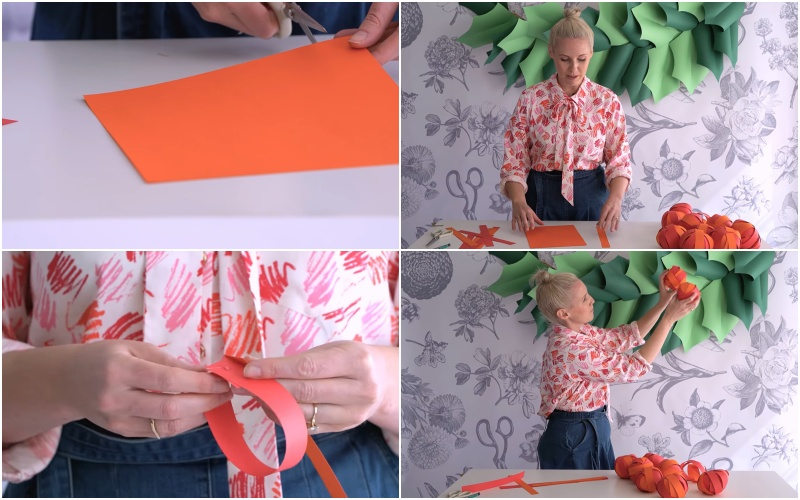
- Cut small circles from red and orange paper strips about 2cm wide width
- Use each strand to attach together to form small circles. Continue to glue each layer alternately to form a ball shape.
- Finally, glue these “berries” onto the wreath in groups of 2 or 3 pairs or clusters where the top of the flower reaches its peak.
3. Handmade Christmas Decorations with Glass Jars
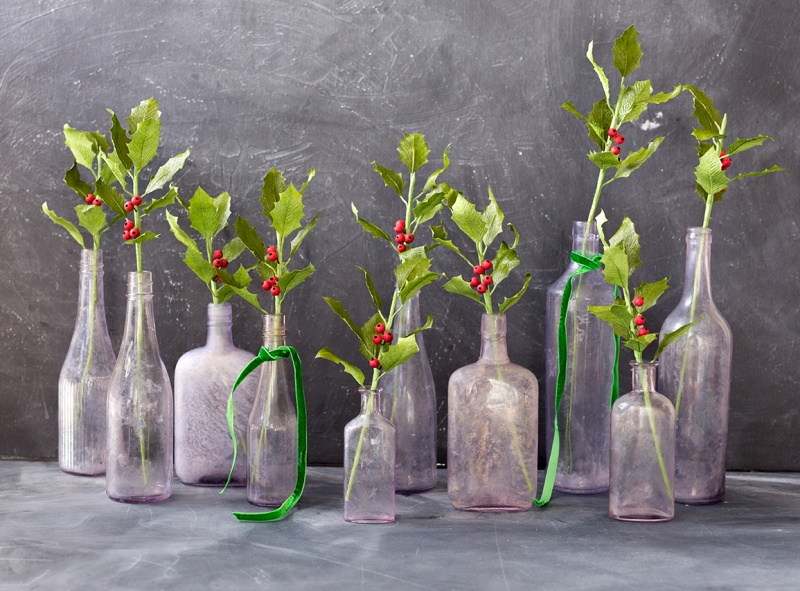
Turning glass jars into festive decorations is a simple and budget-friendly way to add some magic to your home. Though small, these accessories pack a punch, enhancing the sophistication of the space while reflecting the homeowner’s exceptional sense of style.
Materials:
- Crepe paper: 2 colors of green (one color is slightly lighter), red and dark brown.
- 3 size 20 flower stems
- 1 piece of 18 size paper flower wire
- 5 small wooden beads
- Holly leaf template: 1 small, 1 large
- Clear dry craft glue
- Paint brush, pencil, scissors, ruler
- Damp cloth to wipe glue off fingers
How to Make: Handmade Decorative Leaves
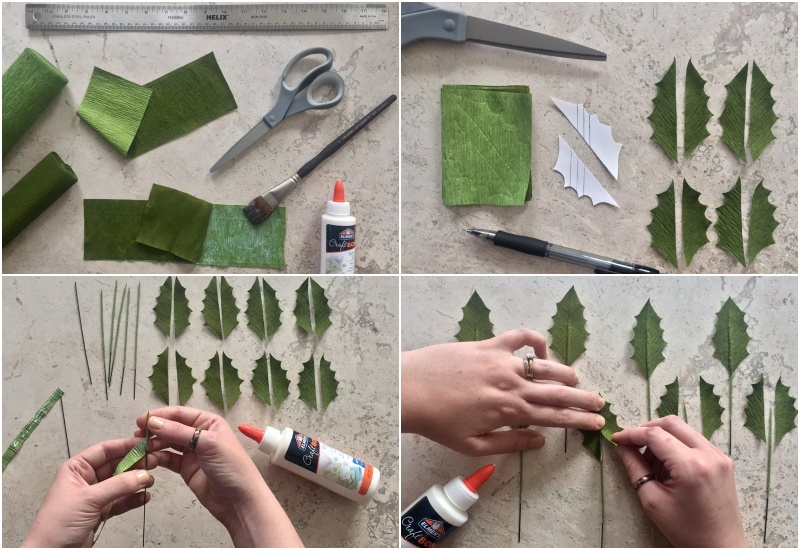
- Cut two strips of crepe paper in different sizes: one 20 cm long for dark green leaves and another 7 cm long for lighter green leaves. Fold the paper evenly and overlap it, making sure to align everything before cutting.
- Cut the wire into equal lengths to form the branches. Wrap each piece with a 1/4 inch wide strip of paper and light green glue, starting from the top and working your way down.
- Next, glue the leaves onto the stem, placing the light green leaves on top and the dark green leaves underneath. Insert a piece of wire into the seam of each leaf and apply glue to the stem. Carefully fold the right side of the leaf over to the left side and press firmly.
- Finally, apply a layer of glue to the dark side of the leaf and let it dry.
How to Make: Handmade Paper Berries
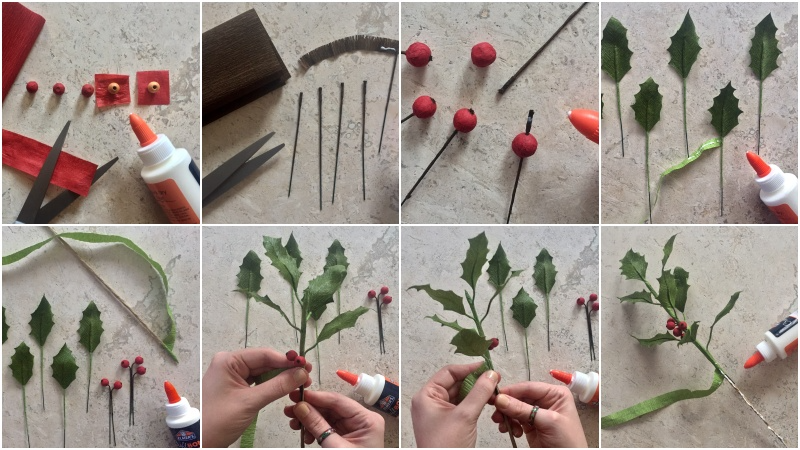
- Cut five squares from red paper, each measuring 2 cm x 2 cm, and wrap each seed in a square. Allow them to dry.
- Cut five stems, each 20 cm long. Wrap each stem with a 0.5 cm wide strip of dark brown paper and secure it with glue. At the tip of each brown stem, add a small amount of tassel and glue it in place.
- Carefully insert the stem into the top of each berry, pushing it in just before it reaches the edge. Apply a bit of glue around the base, then push the stem all the way into the berry, leaving a small portion protruding from the top.
- Curve each leaf slightly to give it a more natural appearance. For a realistic look, aim for about four leaves and a few berries on each tree.
- Finally, continue wrapping and gluing the paper strip along the entire length of the tree trunk, and your homemade crepe paper holly branches will be complete!
4. Handmade Christmas Decorations with Colored Paper Laurel Wreaths
Along with pine trees, gnomes, and decorative lights, the laurel wreath is an essential part of Christmas decorations.
A DIY laurel wreath adds a cheerful touch to your home, whether it’s hanging on your front door, above the fireplace, or as part of a wall display.
Plus, making it from colored paper is budget-friendly and lets you choose colors that perfectly match your holiday decor.
However, if you buy ready-made items, it seems that it is not suitable for those who love uniqueness and creativity. So why not try making a DIY paper laurel wreath
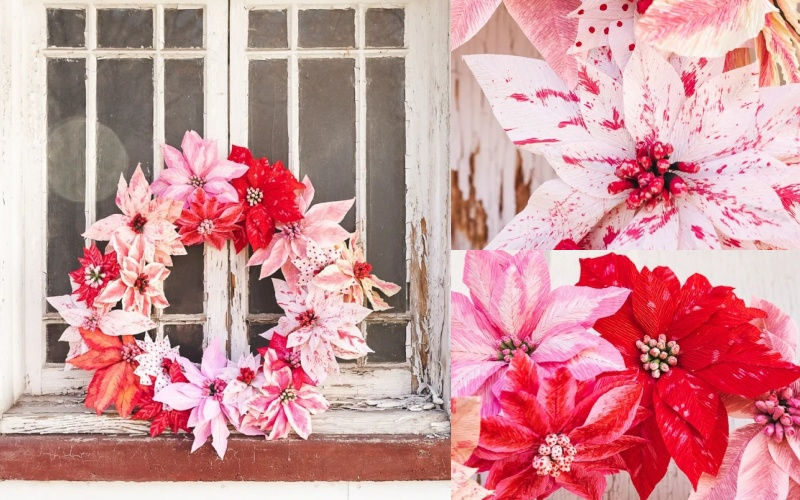
Materials:
- Poinsettia crepe paper
- Acrylic paint
- A set of paint brushes
- Flower wrapping wire
- Wreath shape
- Paper poinsettia flower template
- Hot glue gun
- You can also use this flower arrangement set instead of each individual item if you like.
How to Make: Colored Paper Laurel Wreaths
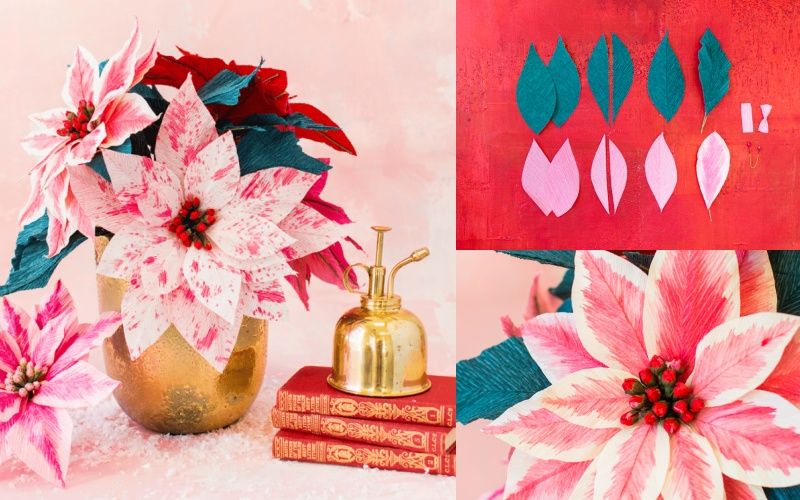
- Start by finding an SVG template for Christmas paper stars online. Use a knife to carefully cut out the pre-printed pattern on the star wings, ensuring you don’t cut all the way through the paper. If you stick with the default size, you’ll need 16 pieces of paper for each star—8 for the front and 8 for the back.
- Next, fold each piece of paper along the scoring lines you created.
- Using a hot glue gun, attach the pieces together along the side edges. As you do this, you’ll see your star begin to take shape.
- Make sure to create two sides of the star—a front and a back—each consisting of 8 segments or 16 points. If you decide to resize the template, you might only need 7 segments on each side.
- Finally, use a small string to hang the stars from the top, and you’re all set!
Conclusion
Creating handmade Christmas decorations is a fantastic way to add warmth and personality to your holiday celebrations. Above are four unique and beautiful decoration ideas you can try. We hope these suggestions inspire you to create sparkling and trendy scenes.
Gather your materials, invite family or friends to join in, and enjoy the process of crafting beautiful decorations that will make your holiday season truly special.
Try these ideas this holiday season and share your creations with us! Visit Storiesfeed for more inspiration.